
Esprit Monster 6 Upgrade
The installation guide is designed to show you how to upgrade to Monstor 6 calipers on the Esprit. This will include replacing the discs, pads, calipers and hoses, which is the basic kit. We also replace our old hubs with V8 hubs, which means the disc bolts on the hub, like most modern cars. This also mean the S4-V8 front wheels will bolt straight on without any modification to the wheels or hub.
Depending on what you want, you can talk to PNM and they'll sort out the best kit for you. See their 4 pot kit here.
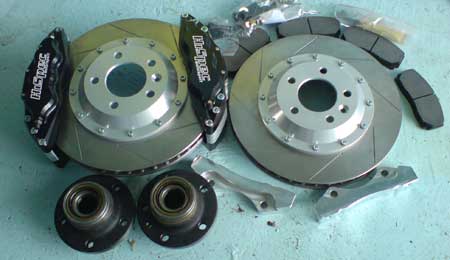
The Esprit brake upgrade shown here uses a kit supplied by PNM Engineering. The kit contains 2x 321mm Ventilated Brake Discs and bells, 2x HiSpec 6 pot Calipers, 2 x braided brake hoses, 2x alloy caliper mounting brackets, assorted nuts, washers & bolts. Brake pads aren't part of the kit, as you can choose which type you want. We've gone for the Hawk pads which should perform well with the grooved discs.
You'll have to bear with us on this guide as we are going from the 4-pot kit to the 6-pot. We've done the hard work in going from the standard Toyota stuff here. So you may which to use both guide to cover all your requirements.
We will be shortly fitting the new 4 pot rear calipers with handbrake. This will help balance out the new 6-pots on the front and give us huge braking ability that the Esprit deserves.
Anything shown below is only a guide. You take the work on at your own risk and Lotus Esprit World or PNM Engineering take no liability for anything you do on your own Esprit. If in doubt leave it to a professional.
Installation
This is quite a large job and will take a minimum of 4 hours, but likely to be much longer is you've not done it before
| Parts supplied by: |
 |
|
You will need the following parts: Brake
Kit |
You will need the following tools: 10,11,
13, 14, 15, 17, 19, 30mm socket/spanners |
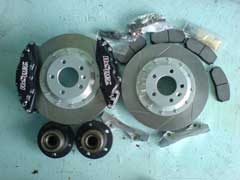
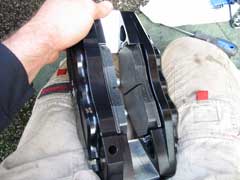
The kit was very impressive. The calipers are huge, especially compared to original Esprit kit (pre-Brembo). We already have the 4-pots on! Which are pretty good, we're just greedy! Check all the contents before starting the job.
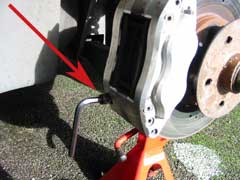
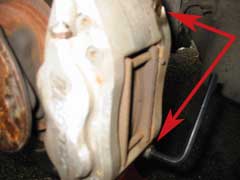
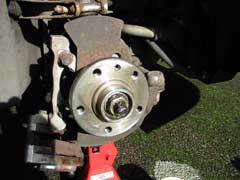
First remove the calipers, if you have Toyota spec, use the other guide. For us it's easy, as we just undo to allen bolts and the caliper slips off. We left it attach to the brake hoses for now. Best to tie up the caliper to stop it handing of the brake piping. Next it's time to remove the hub. The Disc is mounted behind the hub, so you'll need to remove the whole thing to get the old disc off.
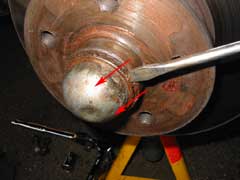
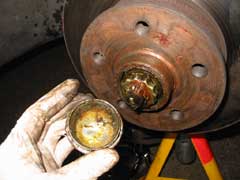

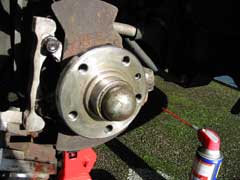
Slip a flathead screwdriver on the lip of the cover and lightly tap it with a mallet. This will ease the cover out. You should be able to move the screw driver around edging the cover off. Once the covers off, you can remove the split-pin (you'll have two new ones in the kit). Straighten the ends with some pliers and pull it out from the top. Next is the lock cap which stops the nut from turning. This should come straight off.

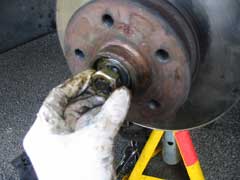
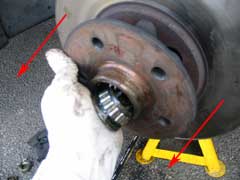
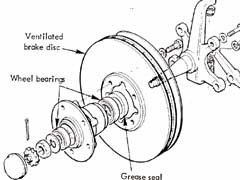
The 30mm nut is only done up hand tight and should come off really easily. The hub will now be free, but be careful of the thrust washer and outer bearing, as these are likely to drop out of the hub as it moves. Pull the hub off and turn it over.
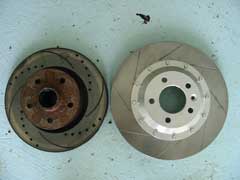
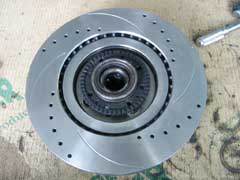
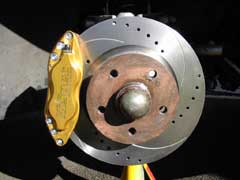
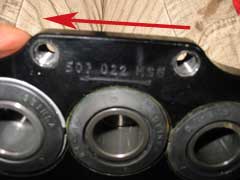
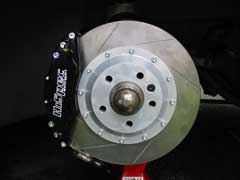
You can see the size of the new discs over the old 4-pot versions. A nice upgrade over the upgrade. If you have ABS you'll need to replace the ABS disc which can be seen on the back of the previous discs. This can be pushed on the then gently knocked into place. I used the rubber handle of a hammer. The hubs were supplied with the bearing already in the rear. It slips on the same way as the older hub, just doesn't have a disc behind it. Fitting instrustions are as the old hub on the other guide.

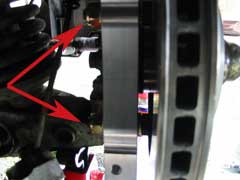
Nice new hubs! We then changed the brackets for the new ones. These are basically the same style as the 4-pot brackets, just to fit the 6-pot. Bolt in with washers and torque up as the 4-pots.

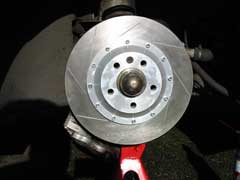
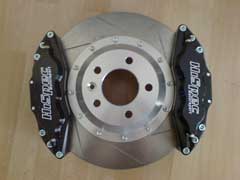
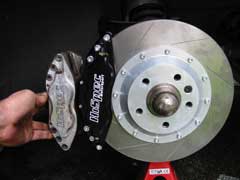
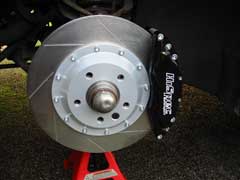
Now you can mount the disc. Simple pop it on and line up the fixing screw hold. Screw it in and you've mounted your disc! Much easier that the old stuff and what all modern cars have. Now on to the calipers.
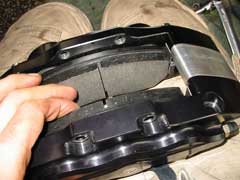
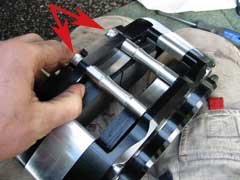
You need to unscrew the holding clips and slip the pads in. You then replace the clip and hold it down and screw the bolts back in.
From PNM: By the way you dont need to undo the pad retaining bolts & springs when fitting the calipers from new, it's a lot easier to push the pads in against the spring until they pop into place either side, then slide the caliper over the disc & fit the mounting bolts (check the pad bolts are actually tight!).
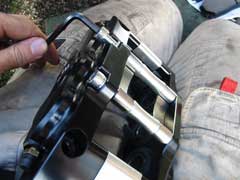
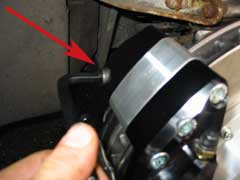
Very easy to change the pads. 100% better than the Toyota stuff with those clips that are a nightmare to get back in. The 6-pot calipers have bleed nipples top and bottom. We only need to use one, but it needs to be at the top. There's an arrow marked inside the caliper so show you which way up it goes. Don't put them on upside down!

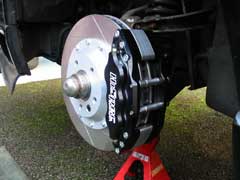
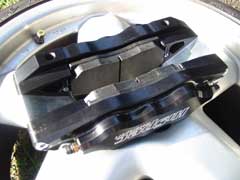
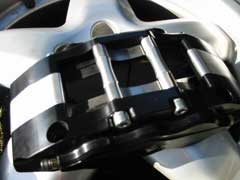
The calipers and pads slip nicely over the disc and bolt on. Easy! Last thing is to attach the brake cable. Undo the bolt and quickly attach it straight to the back of the caliper. You shouldn't lose too much fluid. You then need to bleed the front brakes. There's a guide here for the Stevens Esprits. You only need to do the fronts if you've not done any work on the rears.
Check all fixings, and check for fouling lock to lock.Now clean the brakes with brake cleaner and wipe down. Your brakes now need bedding in according to the pad manufacturers specifications which will be on the brake pad box. You can see the difference from the 4-pot kit, which was a big difference from the strandard stuff.
Verdict
We wanted the biggest brakes on offer and as soon as we heard of the 6-pot front and 4-pot rears, we wanted them. This guide is more to tell you the products there and what we've done. The previous guide going from the standard equipment is pretty good and can be used, as the hub upgrade is easier on this kit. We found the fitting pretty easy, but then we've now done quite a bit of work on our brakes.
That said, you will have to decide if you wish to undertake this work or whether you feel it would be best left to a professional. Remember your brakes are a very important part of your car and work should not be undertaken if you are not capable. These modifications aren't always the right thing to do for every owner. Think carefully before deciding to modify your Esprit.
As for the performance of the 6-pot. We've not been able to really test them yet, but they feel as good as the 4-pots already and they're still bedding in. We'll add to this page once we used them a bit.
Prices
There are 4 kits available for the Esprits. All kits are the same, except kits supplies the hubs for pre93 Esprits and you can choose between normal flat one piece discs or discs and bells.
Prices do not include brakes pads, of which there are different choices. Prices range between £20 and £80 depending on what you are after. PNM can quote you and help you decide which ones will suit your needs most.
| PNMJ2688G | 88> Monster Six with 321mm Discs/Bells (with hubs) | £1,255 |
| PNMJ2693G | 93> Monster Six with 321mm Discs/Bells (without hubs) | £1,175 |
| PNMJ1688G | 88> Monster Six with 323mm one piece Discs (with hubs) | £985 |
| PNMJ1693G | 93> Monster Six with 323mm one piece Discs (without hubs) | £905 |
You can also have the same kit with the cheaper Moster 4-pot calipers. These are the same size calipers with 4 pots instead of 6.
| PNMJ2488G | 88> Monster 4-Pot with 321mm Discs/Bells (with hubs) | £1,145 |
| PNMJ2493G | 93> Monster 4-Pot with 321mm Discs/Bells (without hubs) | £1,065 |
| PNMJ1488G | 88> Monster 4-Pot with 323mm one piece Discs (with hubs) | £875 |
| PNMJ1493G | 93> Monster 4-Pot with 323mm one piece Discs (without hubs) | £795 |
This mod was performed by LEW on their 1992 SE
If you have any comments, feel free to e-mail LEW at admin@lotusespritworld.com
|
|
