ICE Install
ICE installs in the Esprit can be a little tricky due to lack of space and the engine and battery being in a slightly different place to most cars. Some people like to spend a lot of money on an install and some just like to change the front end. The following install is a little bit different. Going for up-to-date technology and keeping the install neat the tidy and even managing to incorporate a rear view camera and DVD player. The only limits is your budget. May be this will give you some ideas.
This guide was kindly supplied by S4 owner John Fernandez
Head Unit (before)
When I bought the Esprit, it had a Sony CD receiver headunit. It was ok, but was in need of an upgrade. Also, it wasn't installed properly and lost memory every time the car was switched off.
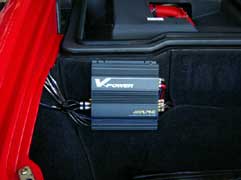
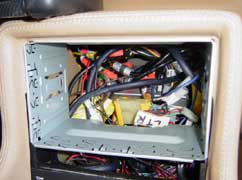
Amplifier (before)
The amplifier install was terrible.

New head unit
I did a lot of research before deciding on which brand of equipment to go with. I went with Kenwood for 2 reasons. Features and integration. This head unit, model number DDX7015, will control almost anything you can imagine or need in an automobile. It controls any or all of the following. CD Changer, Hard Drive Digital Music Player (Music Keg), Mini Disc Changer, Navigation System, TV tuner, DSP unit, Satellite Tuner, Weather Band Reciever, plus a video in and a video out for accessories such as a rear view camera etc. This Head Unit has an unbelievable amount of features. Take a look at the Kenwood website for more info.
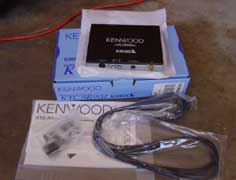
Sirius Satellite Tuner
This is the Sirius Satellite Tuner. I have never used a satellite radio, but I am really looking forward to it. I am especially excited about the commercial free programming and talk radio for those long trips.
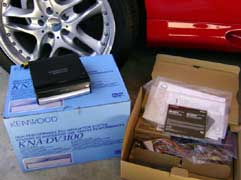
GPS Navigation System
This is the Kenwood KNA-DV3100 Navigation system. Simply said it is awsome! Some of the features include voice activation, voice directions, locating places by phone number and much more.
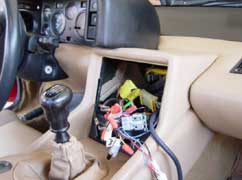
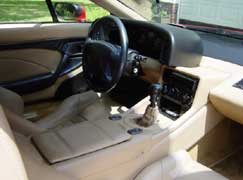
Console Prep.
Before I even purchased the hardware, I had to make a modification to the console. I initially was going to use a single DIN size flip out monitor/head unit. But as I looked into it, I discovered that, when folded out, the monitor would probably not be able to extend fully because of the gauge binicle. Then just as I was ready to buy, Kenwood released the double DIN sized head unit. So I decided to relocate the A/C controls to give me a double DIN opening at the top of the console.
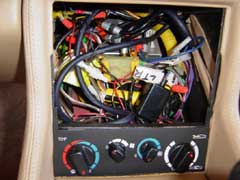
Relocated A/C controls
Here you can see the look after I moved the A/C controls to the bottom of the console.
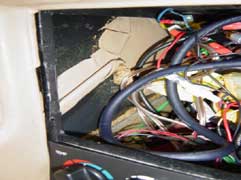
A/C Relocation
I took the console apart twice to do this mod. The first time I was just overwhelmed at the project and just put it back together. The next morning I started again and had it completed in just a couple of hours. The hardest part was detaching the panel from the original location. It is spot welded in place and it was really hard to get at the weld locations with a Dremel tool, but I was finally able to get it off. Then I moved it down to the bottom of the frame and welded it in place. I then grinded it smooth, sprayed it with flat black paint, then some rubberized undercoating for good measure. By the way, after removing the leather covering panals, the metal frame came out easily after removing 4 bolts.
Test Fit, Test Fit, Test Fit
Before connecting any wires I made many test fits to be sure everything would fit. Here is the head unit basket in place.
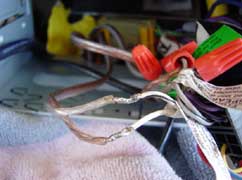
Wiring
The previous head unit was connected with wirenuts. That was not acceptable. Not only does it take up more room in the dash, but the wires can come apart and cause a short. I soldered all wires.
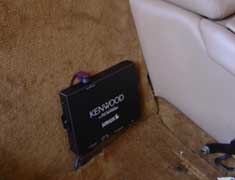
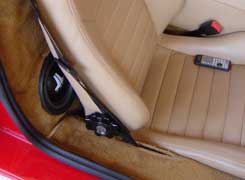
Satellite Tuner
I wanted to keep as many of the components in the cabin as possible to avoid running too many wires to the rear trunk. The satellite tuner fit perfectly behind the passenger seat and didn't hit with the seat all the way back.
Music Keg
The Music Keg was mounted behind the driver seat. I don't have the seat all the way back when I drive, but even with the seat back completly, it only takes up about 2 inches of seat travel.
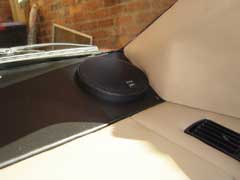
Satellite Tuner and Speaker
Here is a shot of the Satellite Tuner behind the seat.
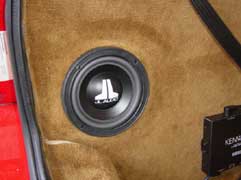
Rear Speakers
I went with JL Audio WO6 6.5 inch midbase/woofers for the rear locations. They have a pretty heafty magnet and were hitting the rear of the box. I made a 1 inch wide, 3/4 inch deep spacer for each speaker and placed them under the carpet. I was really happy with the end result looks. I must also say that these speakers are AWSOME! I can't believe the amount of low end base these things produce. Simply amazing...
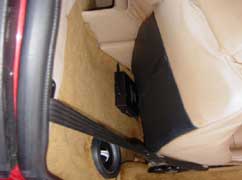
Seat Back
Here is how the speakers look with the seats back. I don't have any grills for them, but I really like the look and don't think they need any protection anyway. I will probably leave them just like this.
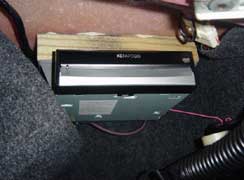
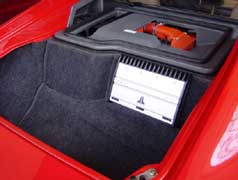
Navigation Install
The navigation unit needs to be installed horizontally. Once you insert the DVD, you don't need to access this piece for normal use. I installed a piece of 2 by 4 under the right rear trunk area and then mounted the navigation unit to that. In this picture, the hump to the left is the vacuum pump. Fortunatly the GPS antenna can recieve through fiberglass, so I mounted it right behind the navigation unit with double sided tape. Unless you really look for it, you won't even know its there.
Head Unit Almost Done
Here is the head unit installed before I installed a cover piece for the remaining space underneath.
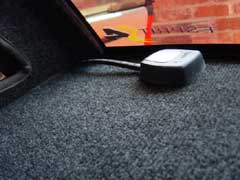
Satellite Tuner Antenna
The satellite tuner antenna can also receive through glass and fiberglass. I placed it inside one of the quarter windows to test the location. If it picks up ok here, I will mount it underneath the carpeted fiberglass panel.
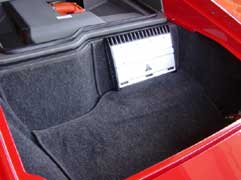
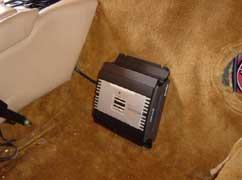
Amp
I went with a JL Audio 4 channel 300 watt amp. This is an awosome amp. It has built in crossovers and sounds great! It was a tight fit, but had just enough clearance so that it doesn't hit the rear hatch when closed. Another view of the amp install. This and the 6.5 inch speakers are the first JL Audio equipment I have ever owned. I am definatly impressed.
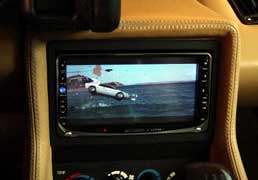
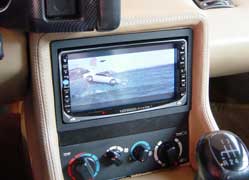
Head Unit in Action
Here is a shot of the manditory Lotus owner movie playing on the head unit. This picture doesn't do it justice. The video quality is awesome!
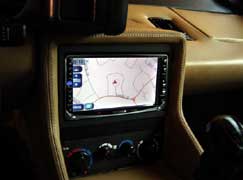
Navigation Mode
Here is a view of the navigation screen in action.
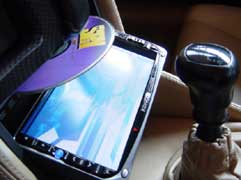
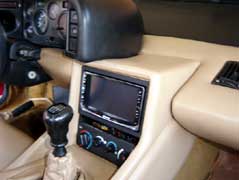
Perfect Fit
This shot is with the gear shift in 1st gear. It left just enough space between the two when in eject mode. I did have some problems getting the head unit to mount all the way in. It was hitting an aluminum electronic control box of some sort in the rear. It may be the SRS control as there was another module near it labled as an SRS sensor that did not interfere. I ended up just unbolting the box and moving it back a half of an inch. This let it fit perfectly.
Finshed
Being that I installed automotive electronics for a living years ago, I must say that this was one of the easiest and most straight forward installs I have ever done. The biggest worry I had was the speaker performance, but the sound quality with the JL Audio 6WO's is awsome. By the way, the dash already had Infinity coax speakers and were in great shape. Infinity is pretty good quality stuff too, so I left them alone, and they sound great.
Here is the additional info on my install.
Well, after about a week after the install, I have had some time to play with the new system. Here are my observations.First, I very rarely listen to FM radio anymore. The satellite radio is awesome! There is plenty of variety and no commercials! The sound quality is excellent and I only lost signal twice for about 5 seconds and that was before I mounted the antenna and it was sliding around.
I really like the fact that all info about the music, artist title etc., are displayed on the screen. The interface is very nice as well. You
can browse the channels by genre and set many preset buttons to change to favorite stations easily.Finally, I paid about $165 for a full years subscription to Sirius Satellite. As for the hard drive music player (Music Keg), it is great as well. The sound quality is great, and it is very easy to use. The only complaint I have is that it can only display 100 playlists. What I did was make a playlist for each band name. I can scroll up to 100, then when I go forward one more it starts back at 1. This is only an issue when displaying the playlists to select one directly. Otherwise, you can simply scroll pass playlist 100 and everything works fine. the only issue is it is a little harder to locate a playlist higher than 100. I will get around this by making a playlist for each letter of the alphabet and combine the bands in fewer playlists. Other than that the Music Keg is great! Another reason why I don't listen to FM anymore.
The video/DVD area is great as well. I haven't used it much yet but I am sure the next time I am stuck in traffic, it will come in very handy. The navigation system is really cool. It has been a great help as I just moved to Charlotte NC and don't know my way around that well yet. It has really been a timesaver and hasn't been wrong yet. even with very small back roads.
The speakers and amps are impressive as well. I am really enjoying my music now on trips around town. It is clear and clean enough to listen to any type of music at very high levels. Or, you can put on some techno or dance tunes and have the bass make your nose itch.
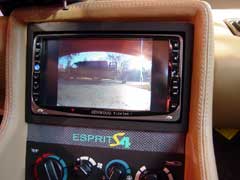
The rear view camera is very comforting when backing near obstacles, but it takes getting used to and not still looking over your shoulder.
All in all, this has been a great mod and I am very happy with it. The only real caution I have for someone considering this is to be careful. It is easy to get distracted while driving and I am not just talking about the video aspect. Searching for an address or song can take your attention away long enough to get you in an accident. I will however be installing the voice activated module as soon as it is released. This should help a good bit in this area. As I make more observations I will post them here.
![]()
|
|