
Esprit Carbon Fibre Airbox
for 4-cylinder Steven's Esprits (NA, Turbo,
SE, S4, S4s, S300 & GT3)
With carbon fibre all the rage over the last few years (well decade) we are seeing more and more pieces being done for the Esprit. Not enough, but then will demand low for such a rare car it's not surprising. We have sunroofs, pod surrounds, sill plates and others have made one-off pieces and of course we have the 350 which as a few items as standard.
With this in mind, when we heard of a TVR company who had made an Esprit Airbox out of carbon fibre, we were very interested to see the quality and fit. We contacted Carbon Cerbie about the Airbox they were advertising on their site www.carboncerbie.com. Very little is given away on their page with just the words 'Lotus Esprit Airbox' and a picture.
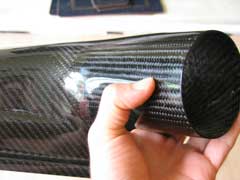
We contacted them about getting hold of one of these items to test to see if it was the type of thing owners would be interested in. After an conversation with CarbonCerbie, they send us one out to try. The Airbox is prepreg made in an auto clave so the material costs are higher than wet lay-up but the finish is far superior, which we found out on opening up the package. Here's what happened once the postman had left.
Installation
This is quite an easy job and depending on your ability should take around 1 hour.
|
You will need the following parts: Carbon
Fibre Airbox |
You will need the following tools: 8,
11mm socket/spanners |
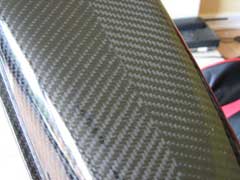
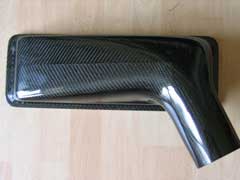
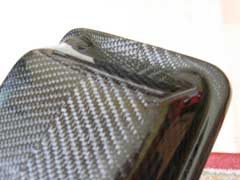
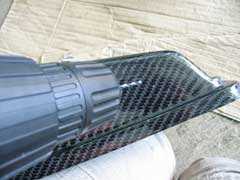
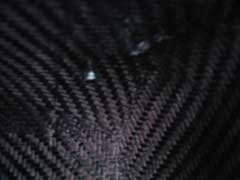
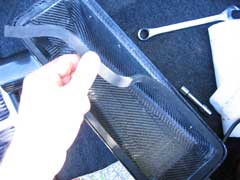
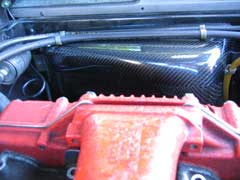
Our Carbon Fibre Airbox came very well packaged and included some rubber material to protect the Airbox from the clamps used on the Esprit to hold the Airbox in place. We checked the quality of the Airbox, which was brilliant. We weren't expecting such a good finish on a part that sits in the engine bay.
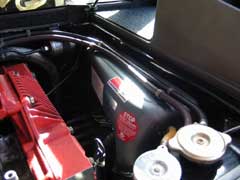
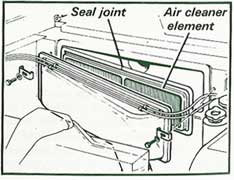
It's obviously been molded from a genuine Lotus Airbox as it's exactly the same as LEW's SE Airbox. They have deleted the crankcase vent intake, which takes a ventilation pipe from the crankcase back into the Airbox. This pipe vents air back into the system that can contain oil mist. By law manufacturers have to vent this back into the car as they can't have oil coming out onto the road. For the private owner, this is ok as the mist isn't going to cause problems (as long as everyone doesn't do it!). We'll deal with the pipe later in this guide. We at LEW ran a Catch Tank to collect this oil and had to seal off the vent intake (see above right). But for this install we are going to run without the catch tank, as you would. Plus we don't want to drill into our new carbon Airbox just yet!
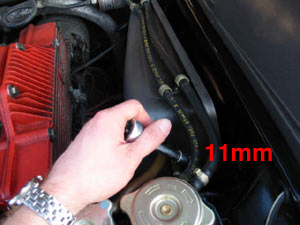
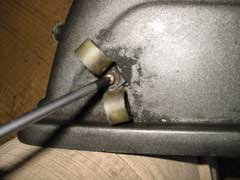
Time to install! First we need to remove the old Airbox and filter. Using an 11mm socket you'll find a clamp either side of the Airbox. Undo these carefully so not to lose the bolt and clamp. You can remove the Airbox without undoing the clamps all the way. You'll also need to disconnect the vent intake pipe as mention above and the jubilee clip holding the main pipe onto the Airbox.
Once these pipes are off or loose, you just need to take the hoses off that run above and to the side of the Airbox. These are fixed using plastic clips, which should just roll out to release the pipes. You can now remove the Airbox from the Esprit.
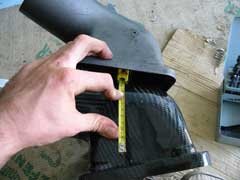
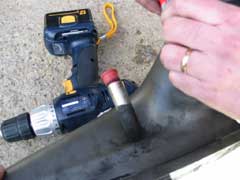
Now unfortunately it's not a case of just putting the new one back in (unless your really lazy and don't care). We need to put the clips on the new Airbox to hold the pipes. These clips are held on to the original Airbox via a screw and nut, so we can easily remove them and refit them to the new Airbox. There are two on the top and one on the side. The nut is an 8mm and you'll need a phillips screwdriver. Once removed you'll need mark up the new Airbox. These holes aren't too critical, as they are only holding the pipes running across the Airbox. Just make sure that the hole isn't so close that the clip can fit vertically to the Airbox. We measured ours up before drilling to make sure.
Using a 3mm drill bit we drilled the three holes for the clips. We then fixed the clips to the Airbox using the original fixings.
Simple tips for safe working with carbon. 1. Wear a dust mask. 2. keep the area you are drilling/sanding wet. This prevents dust.

While we had the carbon fibre Airbox and original one in the same state, i.e. no clips, we weight both items to see what the difference was between them. We didn't expect the weight to be that much difference as it's only a small item and the original wasn't particularly heavy. The outcome was a little unexpected. The carbon version was nearly 3 times lighter than the original! The new carbon one weight-in at 295g against the originals 787g. A saving of 492g or nearly half a kilo!
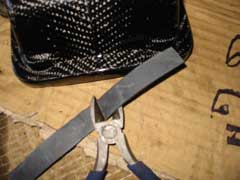
Some rubber material is supplied to protect the Airbox from the clamps. This needs to be cut in half, one piece for each side.
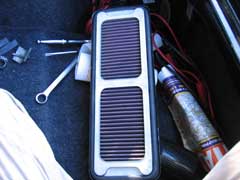
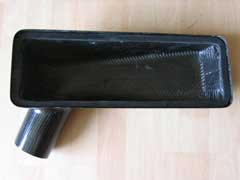
The new Airbox comes with some protective edging inside the Airbox. We needed to remove this to fit our K&N Filter in. Once removed (it's only stuck in) our filter fitted in perfectly.
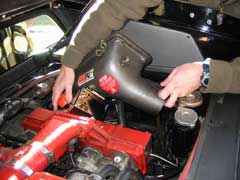
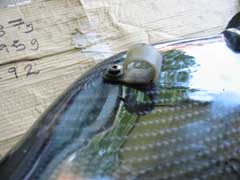
Now time to put our Airbox back in. Firstly put the open end into the pipe, but don't tighten up the jubilee clip yet. You can then line up the clamps and add the rubber protection inbetween. We tighten the clamps enough to hold the Airbox in place. We then fitted the pipes to the Airbox which helps hold it in place.
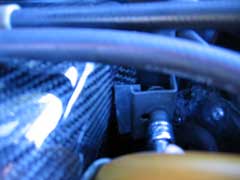
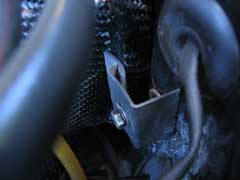
You can then tighten up the clamps. Don't do them too tight as you don't want to crack the new Airbox. You'll need to do it tight enough to secure it and make sure it's air tight. You can see the rubber protector in the middle picture above underneath the clamp.
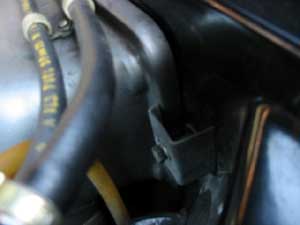
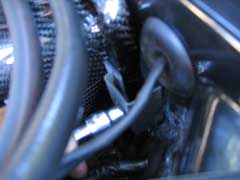
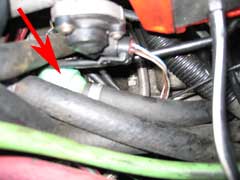
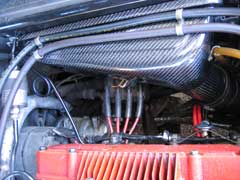
Now time to address the crankcase ventilation pipe. This pipe runs from the green filter shown in the picture above right. Follow this pipe (the one you removed from the old Airbox), we'd already trimmed ours off for the catch tank install. You may wish to reduce the size to fit.
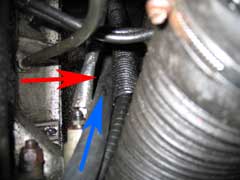
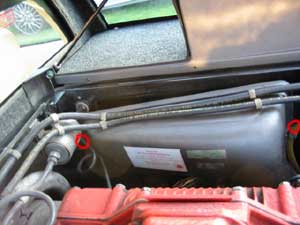
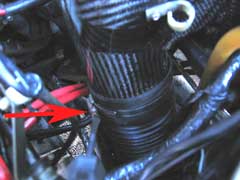
Our pipe was pushed down towards the road. You can see the pipe in the picture above left. The blue arrow follows the pipe and the red arrow points to it's end. You can also see the bleed nipple of the clutch slave cylinder. This will vent the air down out of the bottom of the car and shouldn't spray any oil mist on anything that could get too hot.
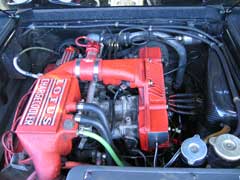
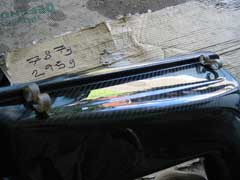
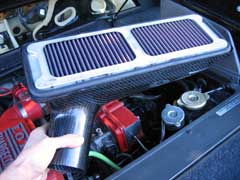
The install is now finished. Check everything is secure and you're ready to sit back the admire your new looking Airbox.
Note on Breather pipe
The crankcase breather is designed to vent excess crankcase gases (pressure) to the inlet system via the airbox. This pipe is connected to the filtered air side of the airbox.The system also has a small bore pipe that sucks fumes back to the inlet manifold when the engine is at idle (small throttle opening).This pipe is fitted with a one way valve to stop boost pressure escaping during normal engine operating conditions (wider throttle opening) By disconnecting the breather pipe from the airbox and routing it out low in the engine bay should not cause any problem.
However at idle it is possible to suck in some air from the vent pipe as well as crankcase gases so theoretically you could suck in some debris.Having a filter on the end of the pipe would guarantee that it could never suck in anything other than clean air. From Lotus engineers experience they have never had a problem running any of their Engineering cars in this condition.
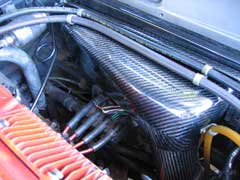
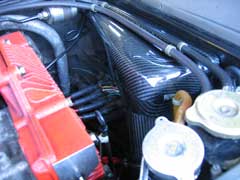
Verdict
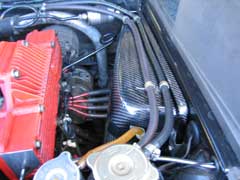
We expected this to be just another carbon fibre part, but as part of the engine bay this looks beautiful. We are normally not overwhelmed by slick parts designed just to look good, but this is brilliant. Not sure if it's just because the old one was so nondescript and barely caught the eye, or not, but we are happier than we thought we'd be with this. Not sure we'll put the catch tank back on if it's going to cover up this beauty!
The price is pretty standard for carbon parts, the quality is outstanding and it does save a lot of weight in relation to the old part (although it's not going to be a significant saving overall). It does bring a touch of class to your engine bay, which was unexpected. If you like this type of thing, you won't be disappointed. If you're not really into tarting up your engine bay like LEW, you'll still be impressed if you take the plunge!
Note: We've spoiled the surprise on the quality of this item and how well it works in the Esprits engine bay.
Prices
The Airbox is available for the Steven's 4-cylinder Esprits (87-99) at Carbon Cerbie for £150.00 + VAT = £176.25 + p&p
Postage UK starts from about £6.00. Please enquire for rates for other countries.Prices updated as of October 2010 to £210 + VAT.
Members can receive a 5% discount on full price. The discounted price is £142.50 + VAT = £167.44 + p&pCarbon Cerbie can take your payments via credit card, switch and American express. To order email enquiries@carboncerbie.com
Also if there are any bike nuts in Lotus Esprit World we also run a bike section on www.carbonspec.co.uk
This mod was performed by LEW on their 1992 SE
If you have any comments, feel free to e-mail LEW at admin@lotusespritworld.com
|
|